Comprehensive guide: how to choose the right materials for sauna ceilings
The sauna is the heart of the Finnish home, a place to relax...
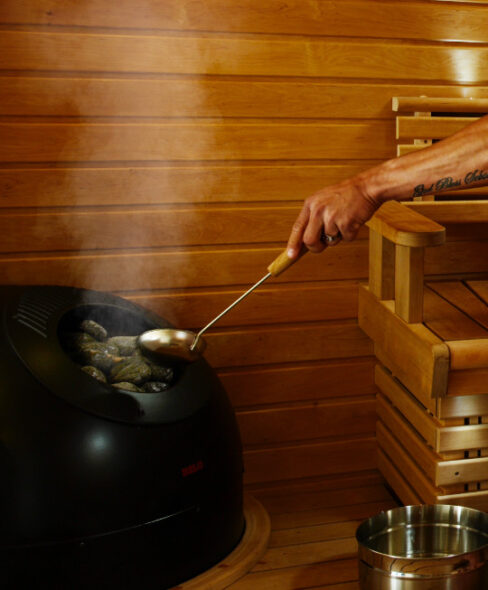
Read moreIn the Sun Sauna video series, the sauna is paneled.
For paneling without mouldings, it may be necessary to stain the vapour barrier so that it is not visible from the ventilation gap. Staining is most easily done with a spray paint suitable for damp areas.
Start panelling the ceiling. The ceiling panel is usually installed so that the light falls on the surface of the panel in the longitudinal direction. Remember that in damp areas, the ceiling panel must be ventilated.
Measure the ceiling and calculate the panel’s pitch. If necessary, narrow the starting panel by at least the amount of the male point. If the washroom ceiling has the same panel and there is a glass wall between the sauna and the washroom, measure the washroom ceiling at the same time. This will ensure that the points of the panel coincide and give the rooms a congruent ceiling surface, adding to the sense of space.
Start panelling from the top of the wall. Cut off the male point of the top panel to make a neat edge. Fix the panels by hidden nailing from the female point, for extra wide panels you may need to secure the fixing either from the male point or by through nailing. Leave a 4-5 mm ventilation gap between the top panel and the roof to ensure air circulation behind the panelling. Saw a drip hole in the bottom edge of the lowest panel.
Remember to check at regular intervals that the panelling is progressing in a straight line.
Check progress regularly by measuring. It is easy to make a few millimetres of paneling adjustment along the way; it is impossible to straighten a slanted paneled surface afterwards without dismantling the whole wall. It is a good idea to do the panelling in a circular motion, taking turns on all the walls to ensure that the points of the panels are aligned.
Watch an in-depth video of the sauna paneling on Sun Sauna’s YouTube channel “
The sauna is the heart of the Finnish home, a place to relax...
Read more
For Finns, taking a sauna is a deeply rooted part of their culture...
Read more
The sauna is the heart of the Finnish home, a place where you...
Read more